
The STN Video WordPress plugin allows you to use the the STN Online Video Platform, all within your WordPress CMS.
HOW DOES IT WORK?
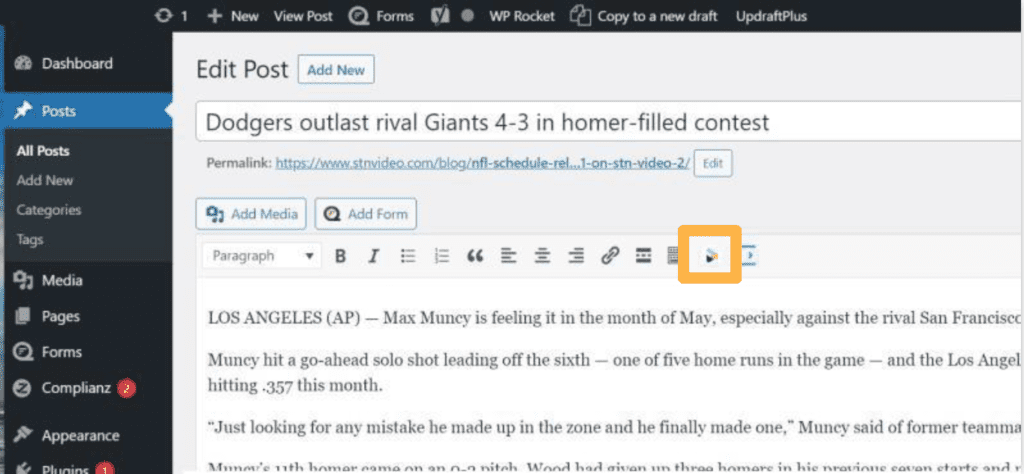
Once installed, the plugin will appear as a widget in your WordPress editor. Simply click the icon to access the dashboard, all while staying in your CMS.

WHAT CAN I ACCESS?
Once inside the WordPress plugin you’ll be able to:
- Access our Publishers Dashboard to browse the STN video library, build playlists and seamlessly embed video
- Add Smart Match players to your article templates
- Add section front players and playlists
GETTING STARTED
- Download the STN WordPress Plugin HERE
- The pages below give you and your development team a step-by-step installation guide
- For any other questions, please contact publishers@stnvideo.com
CONTENTS
1.0
Plugin Requirements
- Plugin Supports
- Plugin Conflicts with Cache Plugins
- Security Considerations forWP-Content/WPMVC folders
2.0
Plugin Setup
- Manual Install viaWordPress Admin
- Manual Install via Web Server
- Remove old STN Video oEmbed plugin
- Plugin Authorization
3.0
Add an STN Video player to a WordPress template
- Add an STN Video player to a template using the Shortcode
- Add an STN Video player to a template using the Widget
4.0
Add an STN Video player to a page or post
- Add an STN Video player to a page or post using the block editor
- Add an STN Video player to a page or post using the classic editor
5.0
Updating/Deactivating/Uninstalling the Plugin
- Automatic Update via WordPress Admin
- Manual Update via Web Server
- Automatic Uninstall viaWordPress Admin
- Manual Uninstall via Web Server
6.0
WPMVC Directory Access Restriction
- ApacheWeb Server Software
- OtherWeb Server Software
- WPMVC Directory Access Restriction for LiteSpeed
- WPMVC Directory Access Restriction forMicrosoft IIS
- WPMVC Directory Access Restriction for NGINX
- WPMVC Directory Access Restriction for other Web Server Software
7.0
NGINX Directory Access Restriction
- Restricting Directory Access
- The Deny Directive
- Locating the NGINX Configuration File
- Restarting NGINX
- 1.0 PLUGIN REQUIREMENT
The plugin was built to support the majority of WordPress installations and setups with both Classic Editors and new Gutenberg Block Editors in mind.
1.1 PLUGIN SUPPORTS
- The plugin has been tested back to WordPress 4.6.
- The plugin supportsMulti-Site / Network installations back to WordPress 4.6.
- The plugin supports the Classic Editor for WordPress pre-5.0 as well as the Classic Editor plugin.
- The plugin supports the Block Editor as of WordPress 5.0 as well as through the Gutenberg plugin.
- The plugin supports the Legacy Widget Editor for WordPress pre-5.8 as well as the Classic Widgets plugin.
- The plugin supports the Block Widget Editor as of WordPress 5.8 as well as through the Gutenberg plugin.
1.2 EMBED CONFLICTS with CACHE PLUGINS
Using optimization plugins to minify your JavaScript files can cause some conflicts with the STN Video Embeds. To avoid these conflicts, please exclude the following player scripts from your minify setup;
embed.sendtonews.com/player1/responsive.js

embed.sendtonews.com/player2/embedcode.php

embed.sendtonews.com/player3/embedcode.js

embed.sendtonews.com/player4/embedcode.js

embed.stnvideo.com/player1/responsive.js

embed.stnvideo.com/player2/embedcode.php

embed.stnvideo.com/player3/embedcode.js

embed.stnvideo.com/player4/embedcode.js
1.3 SECURITY CONSIDERATIONS for WP-CONTENT/WPMVC FOLDERS
The STN Video plugin leverages a framework called WordPress-MVC or WPMVC for short. This framework comes bundled with an implementation of PHPFastCache and KLogger that generates files in your WordPress installation. By default these are installed to a wpmvc folder inside your WP-Content folder as a cache and logs folders respectively. While the contents of these cache and log files are benign it’s still advised to lock them down from public access. For this reason the plugin by default generates an .htaccess lock file in the cache directory that’s autogenerated by the plugin. For other Web Server Software such as NGINX and IIS the .htaccess file is ignored and as such it’s advisable to lock these directories down by means suited to the web server technology employed by the website. See Section 6 for additional information.
PLUGIN ADMINISTRATION
The STN Video OVP WordPress plugin was built with simplicity and ease of maintenance in mind for administrators and editors. It’s a complete replacement of our old STN Video oEmbed plugin with additional features like our Shortcode,Widget and Block.
- 2.0 PLUGIN SETUP
Administrators can install the STN Video plugin by manually uploading the provided zip file to the Plugins admin screen or by transferring the files to their web host directly.
2.1 MANUAL INSTALL via WORDPRESS ADMIN
- Login to WordPress Admin.
- Navigate to Plugins > Add New.
- Click the Upload Plugin button at the top of the screen.
- Select the zip file from your local filesystem.
- Click the Install Now button.
- When installation is complete, you’ll see “Plugin installed successfully.”
- Click the Activate Plugin button at the bottom of the page.
Reference: https://wordpress.org/support/article/managing-plugins/#manual-upload-via-wordpress-admin
2.2 MANUAL INSTALL via WEB SERVER
Server administrators can also upload the plugin to their web server to install the plugin.
- If your server doesn’t have zip capabilities, unzip the plugin zip file locally.
- Connect to your web server with your desired protocol ([S]FTP, SCP, ETC.).
- Upload the plugin folder to the wp-content/plugins folder in your WordPress directory.
- Login to WordPress Admin.
- Navigate to the Plugins admin page.
- Locate the newly uploaded plugin in the list.
- Click the Activate link under the new plugin.
Reference: https://wordpress.org/support/article/managing-plugins/#manual-plugin-installation
2.3 REMOVE OLD STN VIDEO OEMBED PLUGIN
If you have an existing STN Video oEmbed plugin installed, you can deactivate this plugin as the oEmbed functionality is provided by the new STN Video OVP WordPress plugin. The new plugin will prompt you to deactivate the old plugin if it’s currently active.
- Login to WordPress Admin.
- Click the Deactivate link in the admin notice.

- If the notice isn’t present, navigate to the Plugins admin page.
- Find the STN VideooEmbed plugin in the listing.
- Click the Deactivate link on the plugin list item.
- Click the Delete link on the plugin list item.
2.4 PLUGIN AUTHORIZATION
While the activated plugin enables oEmbed and Shortcode functionality, it’s recommended to authorize the plugin with the STN Video API to enable the Block, Widget and TinyMCE integration. This grants editors the ability to embed SmartMatch and Single Video players.
- Login to WordPress Admin.
- Navigate to the Settings > STN Video admin page.
- Fill in your Company ID and Authentication Code.
- Click Save Changes to submit a verification check to the API server.
- You’ll receive a success message.
- The Block, Widget and TinyMCE integration are now enabled.
Note: If you don’t have a Company ID or Authentication Code, or find issues with the verification process, please contact publishers@stnvideo.com.
- 3.0 ADD an STN VIDEO PLAYER to a WORDPRESS TEMPLATE
Adding the STN Video player to your default WordPress templates, across all types of pages, will save you time, costs and resources. The STN Video player has multiple options to ensure the most relevant content is placed onto your site(s):
- Add Smart Match players to your article templates. Smart Match uses artificial intelligence to read your article and match it with the most recent and relevant video in our library of over 1 million pieces of content. Once the article is published, the first viewer will see a default playlist while Smart Match reads the page. All subsequent requests will see the Smart Match contextually aware playlist. This ensures engaging, contextually relevant video will be in every article.
- Add Section Front/Playlist players to your home pages and section fronts. These players will automatically be updated with timely content that is relevant to the page they are on (sports, news, entertainment, lifestyle etc.)
Note: To add these players to your templates, you must be an Admin that has the appropriate permissions to edit files
There are two ways to modify templates to include STN Video players: adding a Shortcode to your PHP template or using the STN Video Widget within the WordPress Widgets Interface and/or Widgets.
3.1 ADD an STN VIDEO PLAYER to a TEMPLATE using the SHORTCODE
What is a Shortcode?
In WordPress, terms a Shortcode is a snippet of text used as replacement for a block of code.
How do I place a Shortcode directly into my page code?
Use the defaultWordPress PHP function “do_shortcode” to place STN Video players directly into your theme templates.
<?php echo do_shortcode( '[sendtonews key="abcXYZilvSTN" type="player"]' ); ?>Note: It’s always recommended to keep a backup when modifying theme files.
Where do I get a specific player Shortcode?
We’re currently working on providing an interface for retrieving Shortcodes. In the meantime, please contact publishers@stnvideo.com.
3.2 ADD an STN VIDEO PLAYER to a TEMPLATE using the WIDGET
What is a Widget?
In WordPress, terms a Widget is an independent section of content that can be placed into any widgetized area provided by your theme (also known as sidebars).
How do I add a Widgetized area to my theme?
Please see theWordPress documentation for more information; https://codex.wordpress.org/Widgetizing_Themes
How do I add a Widget into my theme?
Many themes will provide their hero, sidebar and base sections as widgetized areas, or a developer can create new widgetized areas. If you are an Admin or have access to edit themes ,you can use the STN Video Widget to add a player to your theme templates through these widgetized areas.
- Login to WordPress Admin.
- Navigate to the Appearance > Widgets admin page.
- Drag and drop the STN Video Widget from the Available Widgets to the desired widgetized area.
- Or expand the STN Video Widget, select the desired widgetized area reference and click Add Widget.
- Or in accessibility mode, click Add next to the STN Video Widget.
- Or in Live Preview (Customizer), search and select the STN Video Widget.
- Expand the STN Video Widget and click Add Player to trigger the STN VideoOVP plugin interface.
- Select a Player in the STN Video Smart Match section and Insert Player.
- In the STN Video Widget, click Save.
- Go to a front-end page using the template to preview.
How do I replace a player in my theme?
You can update a STN Video Widget by clicking the ReplacePlayer button and following steps 5-7 above.
How do I remove a player from my theme?
You can remove a STN Video Widget by clicking the Delete link.
- 4.0 ADD a STN VIDEO PLAYER to a PAGE or POST
While you can add individual videos to each article, adding the A.I.-enhanced Smart Match player to your default WordPress template will save money and resources.
Whenever you publish an article, the first viewer will see a default playlist while the artificial intelligence in our Smart Match player reads the content in your post, selects relevant videos from our library, and on all subsequent views will see the SmartMatch contextually aware playlist. This means you only need ONE embed code for all your articles, per content vertical, and don’t have to manually insert or search for video. This can result in hundreds of hours saved that can be reallocated to other areas of your publication.
To embed a Smart Match player in your templates, see section 2.0 above. As of WordPress 5.0, there are now two editors supported by WordPress: the original Classic Editor (WYSIWYG TinyMCE) and the new Block Editor (Gutenberg). The STN Video plugin implementation supports both editors to ensure you always have access to add STN Video players to your articles.
4.1 ADD an STN VIDEO PLAYER to a PAGE or POST using the BLOCK EDITOR
What is a Block?
In WordPress terms, a Block is an interface component for adding and manipulating content.
How do I place a Block directly into my page or post?
If you have access to edit pages or posts and your WordPress interface is enabled with the Block Editor (Gutenberg), you can use the STN Video Block to add a player to your article.
- Login to WordPress Admin.
- Create or Edit a Page or Post.
- Click the circled plus (+) icon to open the Block Inserter.
- Or to place inline, hover over existing blocks to find the circled plus (+) icon.
- Or start typing /STN,and click the STN Video Player Selector entry.
- Within the STN Video Block, click Add Player to trigger the STN Video OVP plugin interface.
- From the popup menu, choose Smart Match Player for Smart Match players or Video Library for Single Video players.
- Or to place inline, hover over existing blocks to find the circled plus (+) icon.
- Select a Player in the STN Video Smart Match section.
- Click the Insert Player button.
- On the Video Library screen:
- Search Stories and Categories or filter by Age and Language.
- Click to expand a Story entry.
- Click an Embed button to insert the desired player.
NOTE: The AMP embed will only load on pages that support AMP.
- Or to place inline, hover over existing blocks to find the circled plus (+) icon.
- In the Editor toolbar, click Save Draft, Publish or Update to save changes.
- Click View Post or Preview to view your article.
How do I replace a player in my theme?
You can update a STN Video Block by clicking the Replace Player button and following steps 5-7 above.
How do I remove a player from my theme?
You can remove a STN Video Block by selecting the Block, clicking the triple dot menu [⋮] and clicking the Remove Block entry.
4.2 ADD an STN VIDEO PLAYER to a PAGE or POST using the CLASSIC EDITOR
What is TinyMCE?
In WordPress terms the TinyMCE editor is a WYSIWYG (What-You-See-Is-What-You-Get) editor for adding and manipulating content in the Classic Editor that predates the Block Editor.
How do I place a player directly into my page or post using TinyMCE?
If you have access to edit pages or posts and your WordPress interface is enabled with the Classic Editor (TinyMCEWYSIWYG) you can use the STN Video TinyMCE integration to add a player to your article.
- Login to WordPress Admin.
- Create or Edit a Page or Post.
- Click the STN logo button found in the TinyMCE editor button row.
- From the popup menu choose Smart Match Player for Smart Match players or Video Library for Single Video players.
- On the Smart Match Player screen;
- Select a Player in the STN Video Smart Match section.
- Click the Insert Player button.
- On the Video Library screen;
- Search Stories and Categories or filter by Age and Language.
- Click to expand a Story entry.
- Click an Embed button to insert the desired player.
NOTE: The AMP embed will only load on pages that support AMP.
- On the Smart Match Player screen;
- In the Editor toolbar click Save Draft, Publish or Update to save changes.
- Click View Post or Preview to view your article.
How do I replace a player in my theme?
You can remove the shortcode by deleting it and add a new one following steps 3-6 above.
How do I remove a player from my theme?
You can delete the shortcode from the TinyMCE (WYSIWYG) editor to remove the player.
- 5.0 UPDATING/DEACTIVATING/UNINSTALLING THE PLUGIN
Administrators can update/uninstall the STN Video plugin through the WordPress Admin or by manually updating files on their web host directly.
5.1 AUTOMATIC UPDATE via WORDPRESS ADMIN
With the plugin zip file, you can manually upload it and update it through the Plugins admin screen.
- Login to WordPress Admin.
- Navigate to Plugins > Add New.
- Click the Upload Plugin button at the top of the screen.
- Select the zip file from your local filesystem.
- On the Plugin Exists screen, click the Replace current with uploaded button.
- When installation is complete, you’ll see “Plugin installed successfully.”
- Click the ActivatePlugin button at the bottom of the page.
5.2 MANUAL UPDATE via WEB SERVER
Server administrators can also upload the plugin to their web server to install the plugin.
- If your server doesn’t have zip capabilities, unzip the plugin zip file locally.
- Connect to your web server with your desired protocol ([S]FTP, SCP, ETC.).
- Upload the plugin folder to the wp-content/plugins folder in your WordPress directory replacing the existing plugin folder.
- Login to WordPress Admin.
- Navigate to the Plugins admin page.
- Locate the newly updated plugin in the list.
- If it’s not active, click the Activate link.
5.3 AUTOMATIC UNINSTALL via WORDPRESS ADMIN
The safe and easy way to uninstall a plugin is via theWordPress admin screen.
- Login to WordPress Admin.
- Navigate to Plugins.
- Click the Deactivate link under the plugin.
- Click the Delete link under the plugin.
Reference: https://wordpress.org/support/article/managing-plugins/#automatic-uninstallation
5.4 MANUAL UNINSTALL via WEB SERVER
In rare cases, you may need to manually uninstall a plugin without using the Plugins admin screen. This is recommended only when absolutely necessary and requires a server administrator.
- Navigate to your Plugins admin screen and locate the plugin to be installed.
- Click the plugin’s Deactivate link.
- Connect to your web server with your desired protocol ([S]FTP, SCP, ETC.).
- Navigate to your WordPress directory, then into the wp-content/plugins folder.
- Locate the STN Video plugin folder.
- Delete the plugin folder and its contents.
- Navigate to your Plugins admin screen, and review the list of plugins to confirm that you have successfully removed the intended plugin.
Reference: https://wordpress.org/support/article/managing-plugins/#manual-uninstallation
- 6.0 WPMVC DIRECTORY ACCESS RESTRICTION
The STN Video plugin leverages a framework called WordPress-MVC or WPMVC for short. This framework comes bundled with an implementation of PHPFastCache and KLogger that generate files in your WordPress installation. By default, these are installed t o a WPMVCfolder inside your WP-Content folder as a cache and logs folders, respectively.
While the contents of these cache and log files are benign it’s still advised to lock them down from public access. For this reason, the plugin by default generates an .htaccess lock file in the cache directory that’s autogenerated by the plugin.
For other Web Server Software such as NGINX and IIS, the .htaccess file is ignored, and as such it’s advisable to lock these directories down by means suited to the web server technology employed by the website. Depending on your web server environment and configuration, the approach to securing the wpmvc folders will differ.
6.1 APACHE WEB SERVER SOFTWARE
Apache is one of the most popular web server software platforms for running WordPress. By default, the WPMVC framework generates a .htaccess file which, in most cases should be sufficient to direct the Apache web server to disallow web-based access to files within the cache directory.
If you are running Apache and files remain accessible, or you would like to lock down the entire wpmvc folder, move the .htaccess file from the cache directory to within the WPMVC directory, or create a .htaccess file to contain the following directive:
Deny from allIf files continue to be web accessible, then check the appropriate ownership and permissions and your Apache configuration as it may be set to disable use of .htaccess files or contains conflicting rules.
6.2 OTHER WEB SERVER SOFTWARE
For those that use web server technologies other than Apache, their server configuration will need to be updated to not expose the WPMVC folder as the autogenerated .htaccess file won’t apply in these environments. To assist web admins in this situation, we’ve provided the following help resources.
6.3 WPMVC DIRECTORY ACCESS RESTRICTION for LITESPEED
LiteSpeed uses the same configuration format as Apache HTTP Server and is compatible with most Apache features, including .htaccess files. The auto-generated .htaccess file should be sufficient in most cases to direct the LiteSpeed web server to disallow web-based access to files within the WPMVCcache directory.
If you are running LiteSpeed and files remain accessible, check that the WPMVC cache/.htaccess file has the correct owner and permissions. Another cause for the .htaccess to be ignored is the LiteSpeed configuration has diabled the use of .htaccess files or, there’s a parent configuration that is negating the directive in the provided .htaccess file.
6.4 WPMVC DIRECTORY ACCESS RESTRICTION for MICROSOFT IIS
Microsoft IIS doesn’t adhere to .htaccess files so to restrict access to directories on IIS systems, perform the following steps:
- Open IIS Manager.
- Navigate to you WebSites WP-Content/WPMVC directory.
- In the right pane, double-click Authentication.
- For Anonymous Authentication, choose Disabled.
- Restart the IIS server.
6.5 WPMVC DIRECTORY ACCESS RESTRICTION for NGINX
NGINX does not read .htaccess files, and any restrictions set with a .htaccess file will not apply. As such, the auto-generated .htaccess file created in the WPMVC/cache folder will not be adhered to. To ensure this directory doesn’t lose protection on servers running NGINX, follow the dedicated guide in Section 7 for instructions on restricting directory access on NGINX web servers.
6.6 WPMVC DIRECTORY ACCESS RESTRICTION for OTHER WEB SERVER SOFTWARE
If your web server software is not listed above, then please consult with your server administrator, web hosting provider or contact your publisher success manager for further advice and assistance.
- 7.0 NGINX DIRECTORY ACCESS RESTRICTION
NGINX does not read .htaccess files and any restrictions set with an .htaccess file will not apply. As such the auto-generated .htaccess file created in the wpmvc/cache folder will not be adhered to. To ensure this directory doesn’t lose protection on servers running NGINX, follow the dedicated guide below for instructions on restricting directory access on NGINX web servers.
7.1 RESTRICTING DIRECTORY ACCESS
For non-cPanel environments
The following steps require root access to the server running NGINX. If you do not have root access, you will need to contact your web hosting provider or server administrator.
- Login to the web server.
- Locate the NGINX configuration template (see Section 7.3).
- Add the Deny Directive (see Section 7.2) to the server block of your site’s configuration.
- Save your changes, and restart the NGINX server (see Section 7.4).
For cPanel environments
You can use the cPanel Directory Privacy interface (cPanel > Files > Directory Privacy) to add protection to this directory.
Note: The cPanel Directory Privacy interface only supports this process in cPanel & WHM version 84 and later. On a server that runs cPanel & WHM version 82 and earlier, use the non-cPanel environment steps below.
To protect the directory, perform the following steps:
- Login to cPanel.
- Navigate to the Directory Privacy interface in cPanel > Files > Directory Privacy.
- Select the Password protect this directory checkbox.
- Enter a display label in the Enter a name for the protected directory text box.
Note: This name only functions as a label for the directory. Do not confuse it with the directory’s actual name. - Click Save. A confirmation message will appear. Click Go Back to return to the directory’s configuration.
7.2 THE DENY DIRECTIVE
server {

location ^~ /wp-content/wpmvc/ {

deny all;

return 403;

}…

}
Note: If WordPress is installed in a directory, or if the WP-Content folder is installed in a non-standard location, then make sure the location path matches your web server configuration.
Important: You must add this location directive to the top of your server configuration block.
7.3 LOCATING the NGINX CONFIGURATION FILE
NGINX has a very flexible configuration organization. Because of this your configuration file may be in a number of different locations.
cPanel & WHM
The following path is the default location of the NGINX configuration file on cPanel & WHM servers:
/etc/nginx/conf.d/users/<username>.confDebian & Ubuntu
The following path is the most common location:
/etc/nginx/sites-available/defaultAdministrators will often setup configuration files for each site individually. In those cases, you can often find the configuration files for each domain in the /sites-available directory:
/etc/nginx/sites-available/example.comNone of the Above
If the configuration file is not found in any of the above locations, at the terminal/ command prompt, run the following command:
nginx -tThe output should display the current directory path to your server’s NGINX configuration file. The output should resemble the following:
nginx: the configuration file /etc/nginx/nginx.conf syntax is ok

ginx: configuration file /etc/nginx/nginx.conf test is successful
To check if the NGINX configuration file contains any include directives, run the following command:
grep include /etc/nginx/nginx.confIf the grep command does not return any output, then you can proceed with your changes to the configuration. If the grep command returns any includes, you must check each include file for the server directive and any conflicts. The following grep command output displays an NGINX configuration file that contains includes:
include /etc/nginx/modules-enabled/*.conf;

include /etc/nginx/mime.types;
If none are found, the server block should be found in the config file found with nginx -t. If included configuration files are found, it will be necessary to check each of the included files for the server directive.
7.4 RESTARTING NGINX
After making any configuration changes to NGINX it is necessary to reload the NGINX config.
cPanel & WHM
Run the following command:
/usr/local/cpanel/scripts/restartsrv_nginxOther Operating Systems
CentOS 6:
/etc/init.d/nginx reloadCentOS 7:
systemctl reload nginx.serviceDebian/Ubuntu:
systemctl reload nginx


